Simple gift idea for Mother’s Day to mothers who provide love and care for others! Like many of you, I’m a mom who also has a lovely mother-in-law. So, I wanted to create something special to express my gratitude.
At the same time, I wanted to “WOW” her with big smiles!
Surprisingly, these simple gifts are easy to make even for busy people! How special would you feel knowing someone was thinking about you?
That’s what we are going to do today: put our thoughts into action!
In this tutorial, I’ll share some simple gift ideas that get a “WOW!” result.
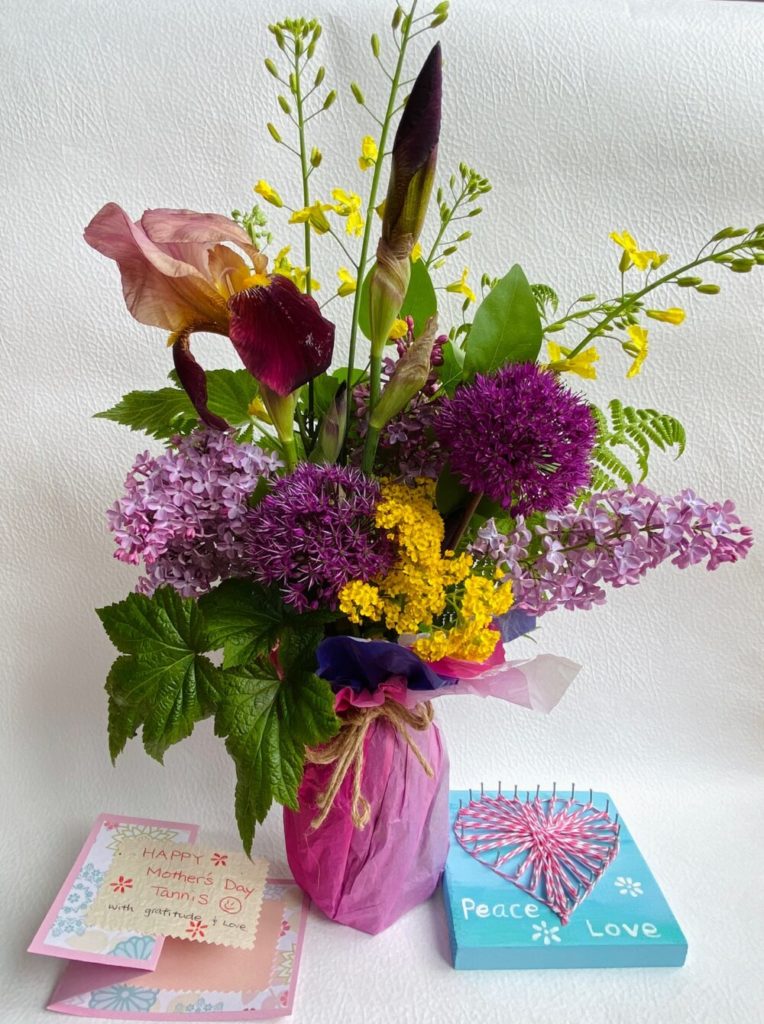
Simple Gift Ideas #1: Flower Arrangement
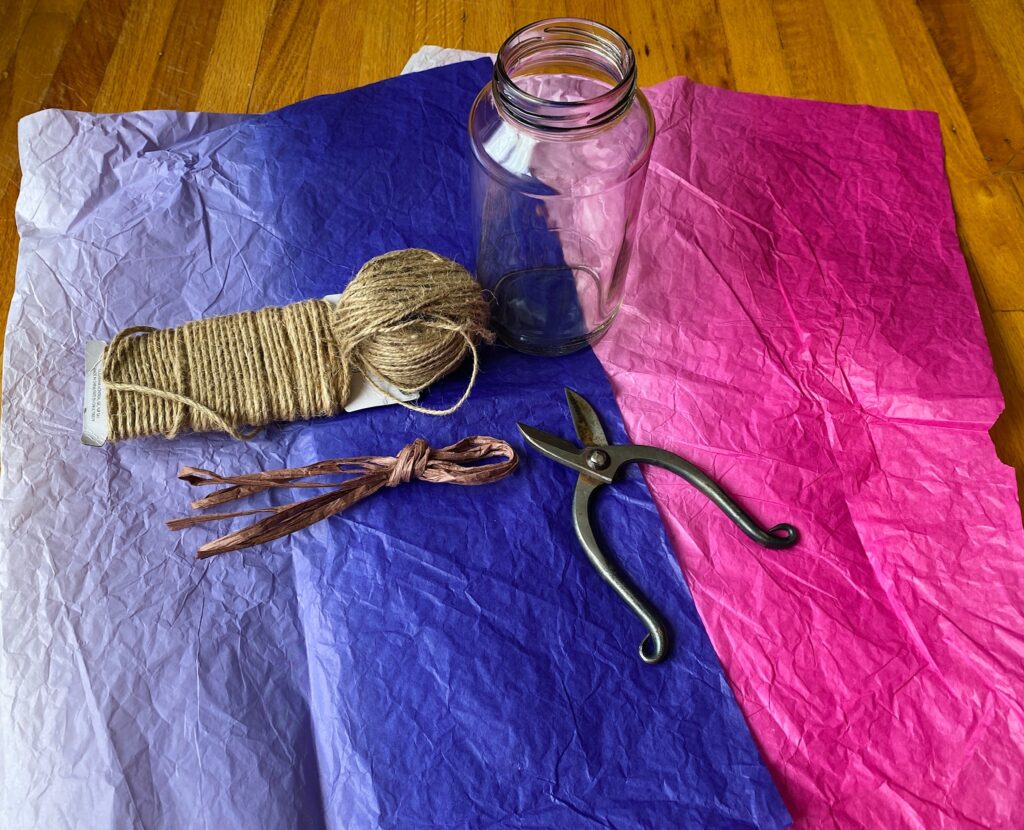
What you need
- washed glass jar (repurposed)
- wrapping tissue (reused)
- natural material strings
- ikebana/garden shears
- flowers & greens from your garden!
How to make a simple flower arrangement
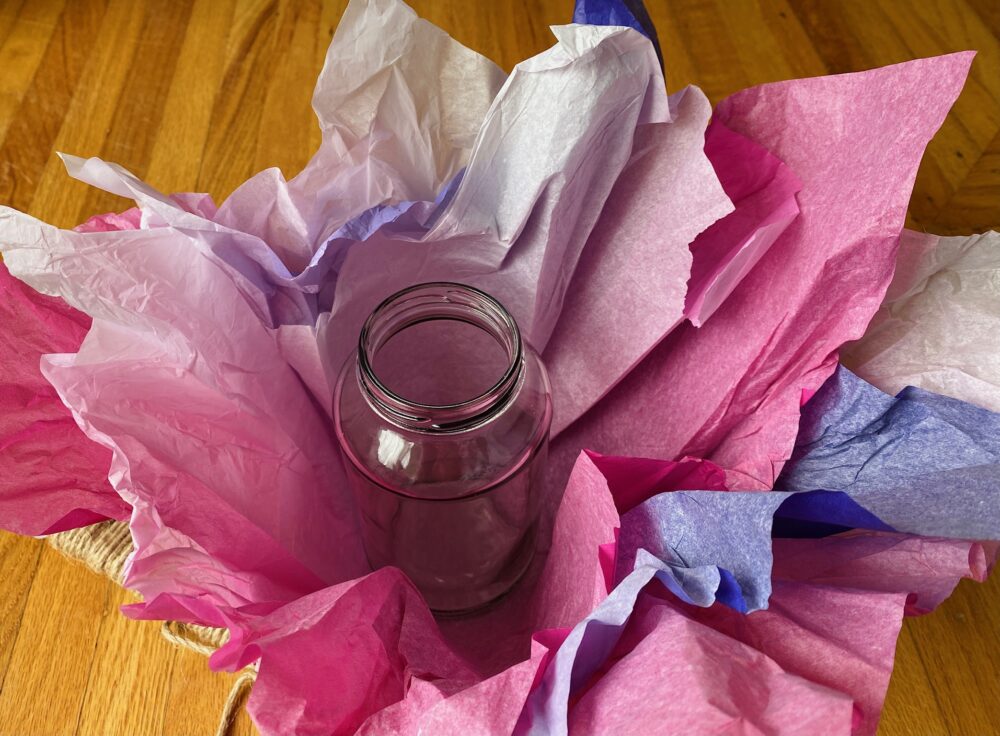


First of all, cut the full-size sheet of tissue in half. Then lay them on a flat surface. As you can see, I used two pink & one purple sheet, and their corners were placed in different directions. To clarify, you should be able to see twelve corners from the top.
Next, bring all the corners up to the top, then tie with a string of your choice.
When you are done, it’s time to gather some flowers and greens from your garden.
Finally, fill the vase with water and start arranging the flowers!
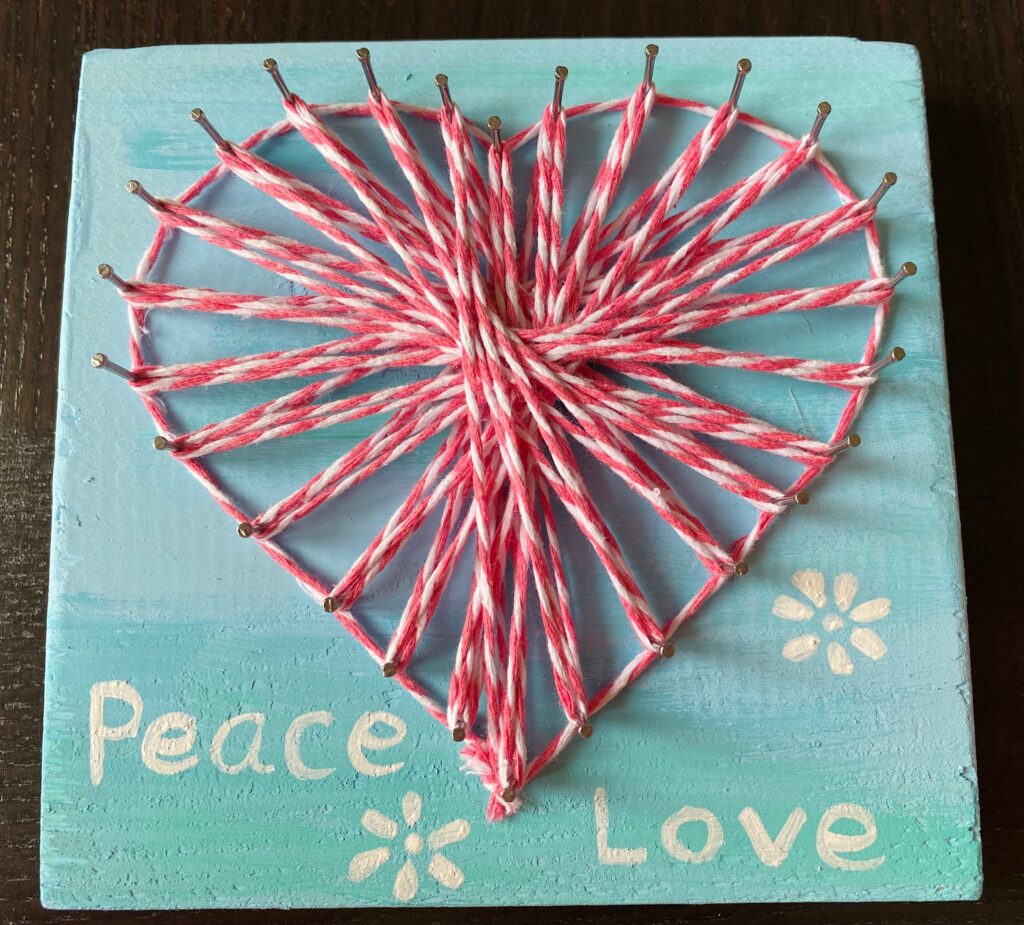
Simple Gift Ideas #2: Heart Craft
This is what a teacher shared as a mother’s day gift idea with our students. So I made one at home as well to share with you! You can repurpose any piece of wood.
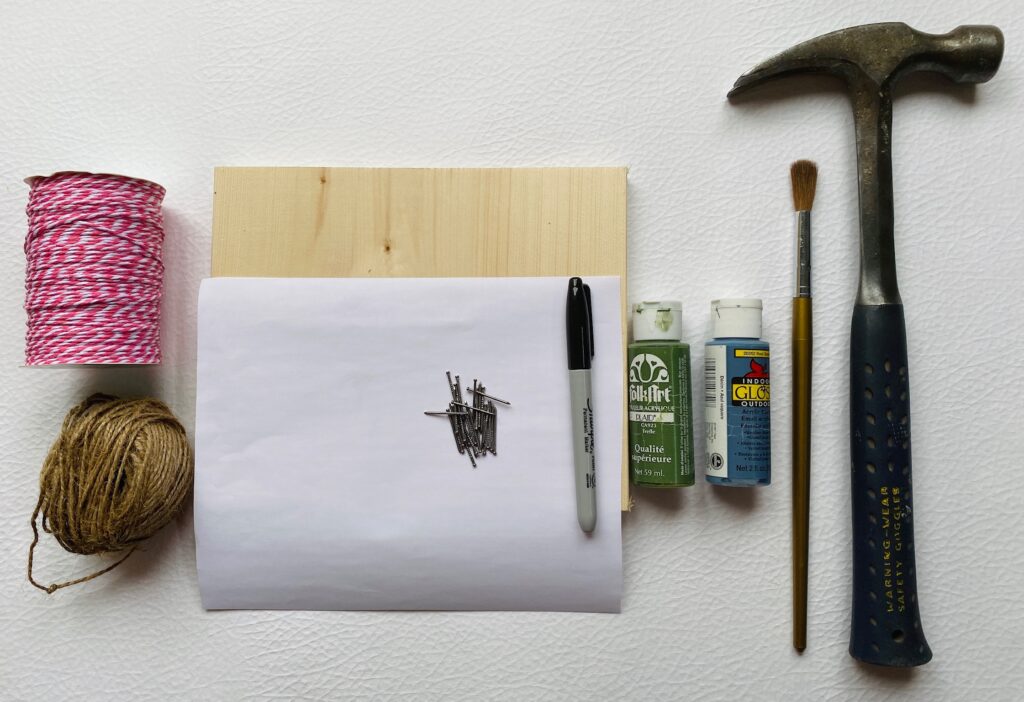
What you need:
- hammer
- paintbrush
- acrylic paint
- piece of wood
- sandpaper (if you have)
- 2 pieces of recycled paper & a marker for designing a shape
- nails
- yarns/threads
How to make a simple heart gift
Step 1
To begin, cut a piece of wood to the desired size. Then use some sandpaper to smooth out the rough edges.
Next, paint/stain the wood and dry. What you need to know is the middle part will be hidden behind a yarn/thread. So you may want to add some art/message until the weaving is finished.
Step 2
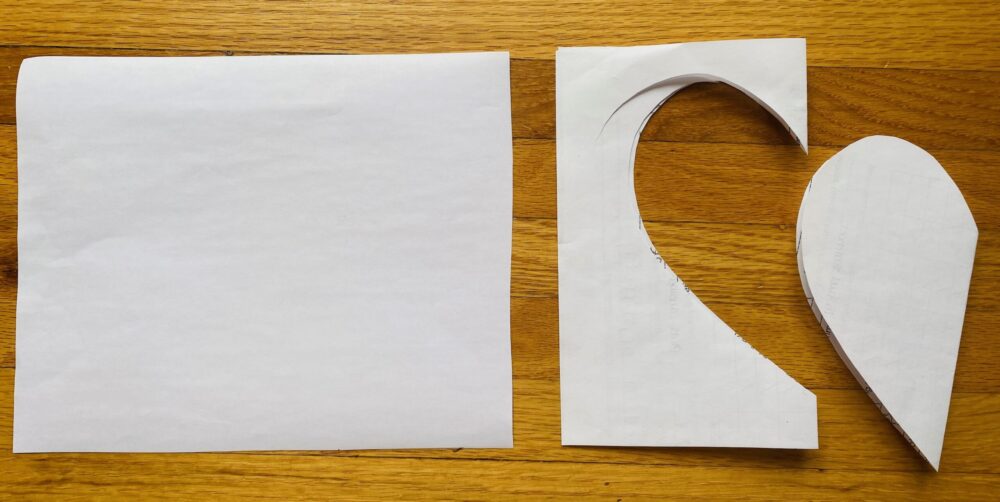
While the paint is getting dry, create a pattern on a piece of paper. What you need is two pieces of paper that are the same size as the wood piece.
First of all, fold one piece in half, and cut out a heart as you see in the picture.
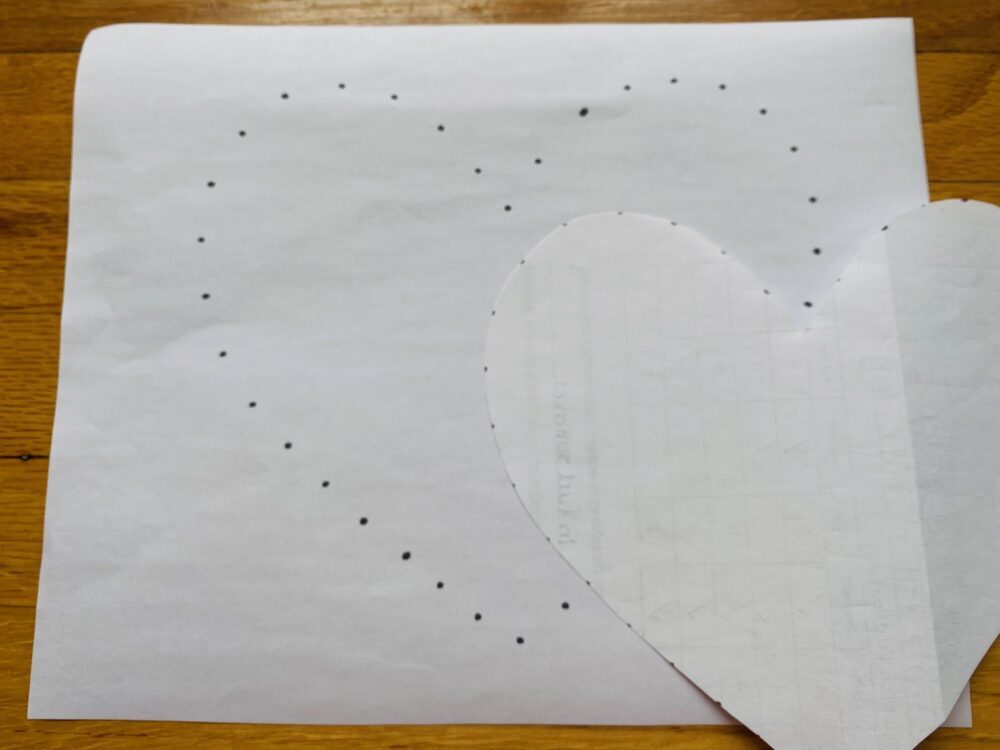
Second, open it up and place it on the other piece of paper. Then, trace dots around the heart roughly 1.5cm/1 and a half-inch space in between. Once you are done, remove the heart.
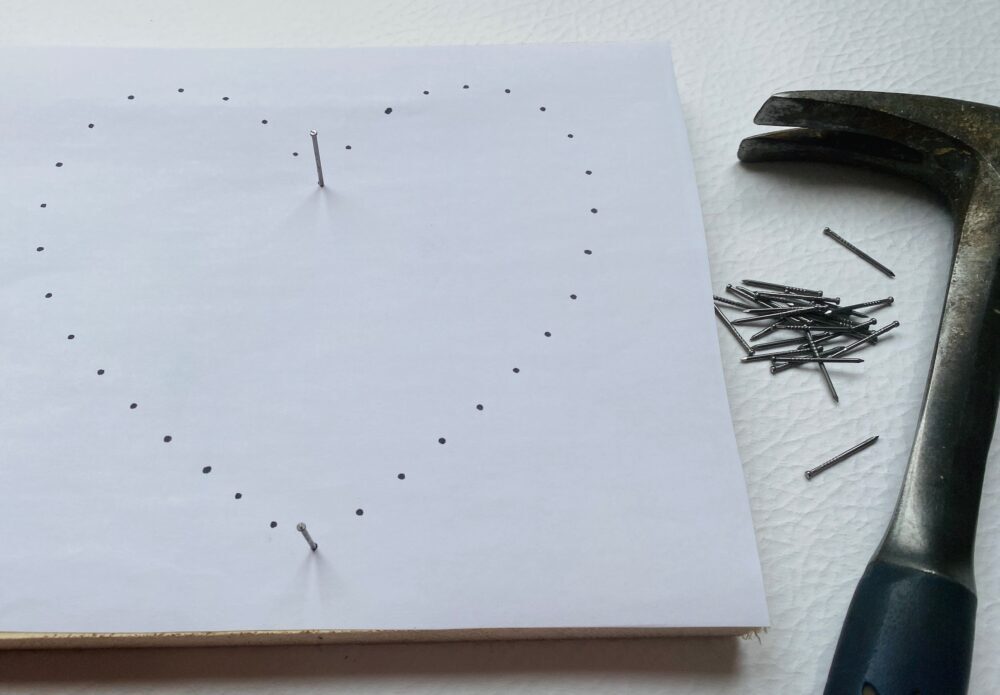
Next, place the dotted paper on the piece of wood. To help stabilize the pattern, hammer in a nail at the top and bottom as you see in the picture.
When you finish nailing the heart, simply pull to remove it. This most definitely gives you satisfaction!
Step 3
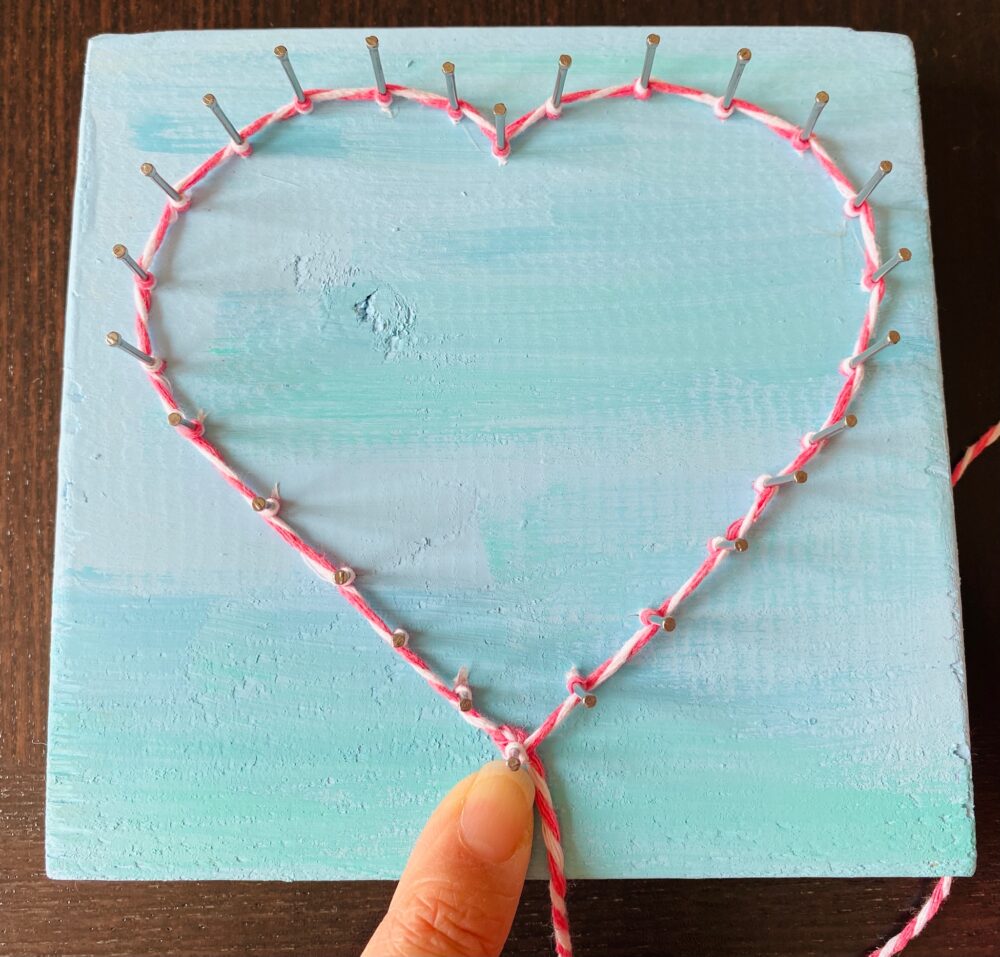
For the next step, tie a knot at the bottom. By wrapping around in only one direction, keep moving toward where you started. As you can see in the pictures, use your index finger to stabilize the yarn/thread.
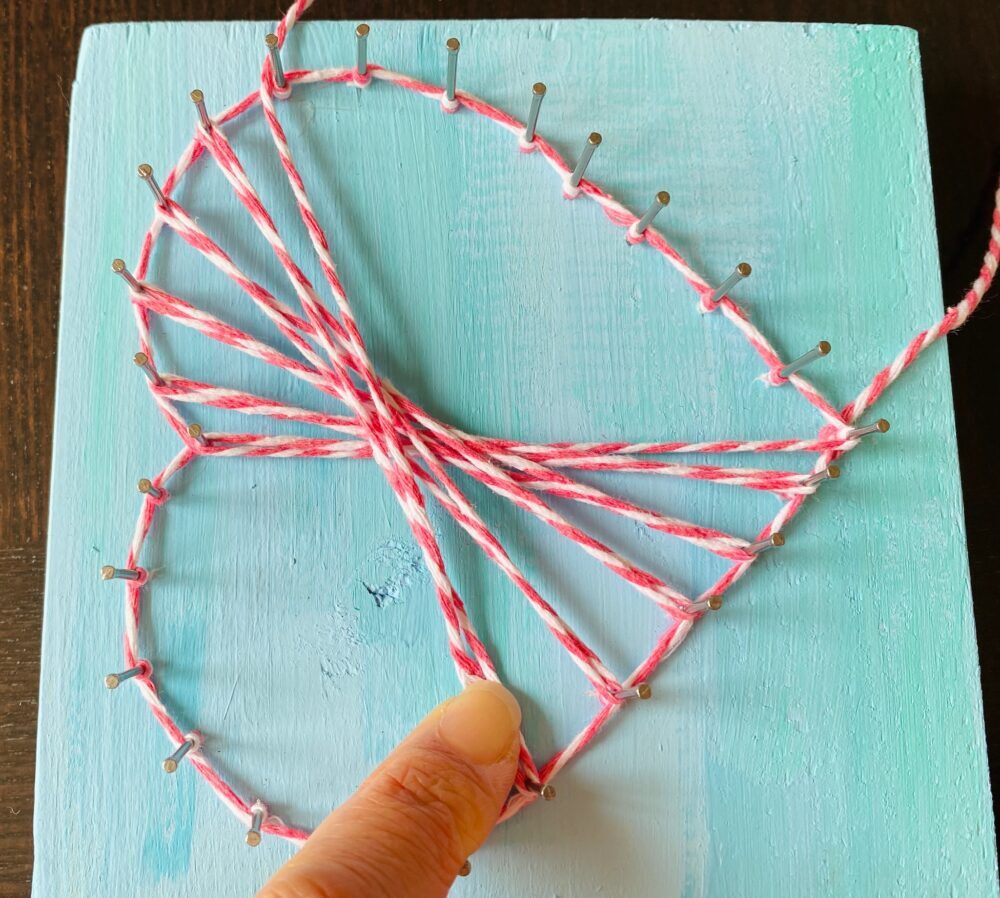
Once you finish the outline of the heart, start weaving the middle. In my case, I created the pattern moving right by wrapping a nail with the letter X each time. But you don’t have to do that. It’s totally up to you!
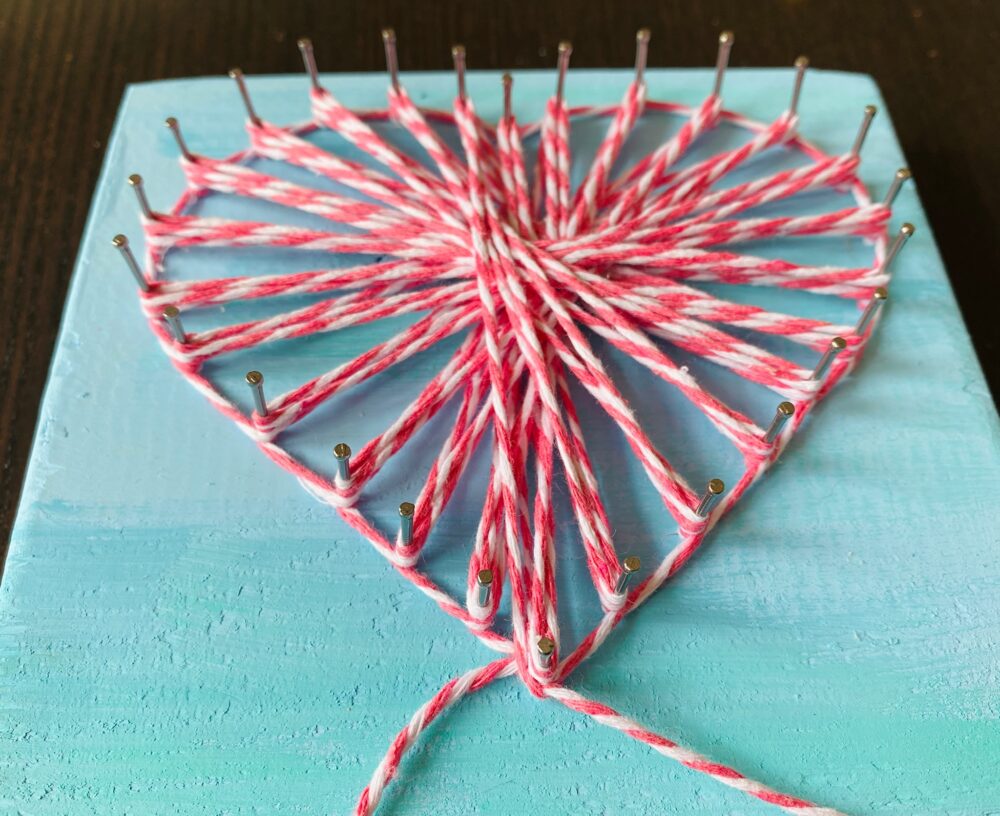
When you finish filling the heart, tie a knot with the other end. Then cut the extra length for a clean look.
Mission Accomplished!
What do you think? Do they look simple enough that you want to make one for someone special in your life? You can also create patterns like cars, bicycle wheels, football, and more for a father’s day gift.
Just to let you know, I did have a lovely visit with my mother in-law. She was certainly delighted and said: “Wow! Did you make these?” “How lovely! Are they from your garden?” That made my day!