
Should I resize the bookshelf or sell/give…? Don’t you hate the feeling when you know your furniture is the wrong size?
Unfortunately, that was how I felt with the bookshelf I got from my parents-in-law. It was just too tall (over 2m) for our house. Since I’m Japanese, I’m cautious about putting something high due to earthquakes. That also made me feel uneasy.
After giving it a thought, I decided to resize it to create something suitable for my needs.
In this tutorial, you’ll find how to resize a bookshelf & organizing it.
Process of resizing the bookshelf
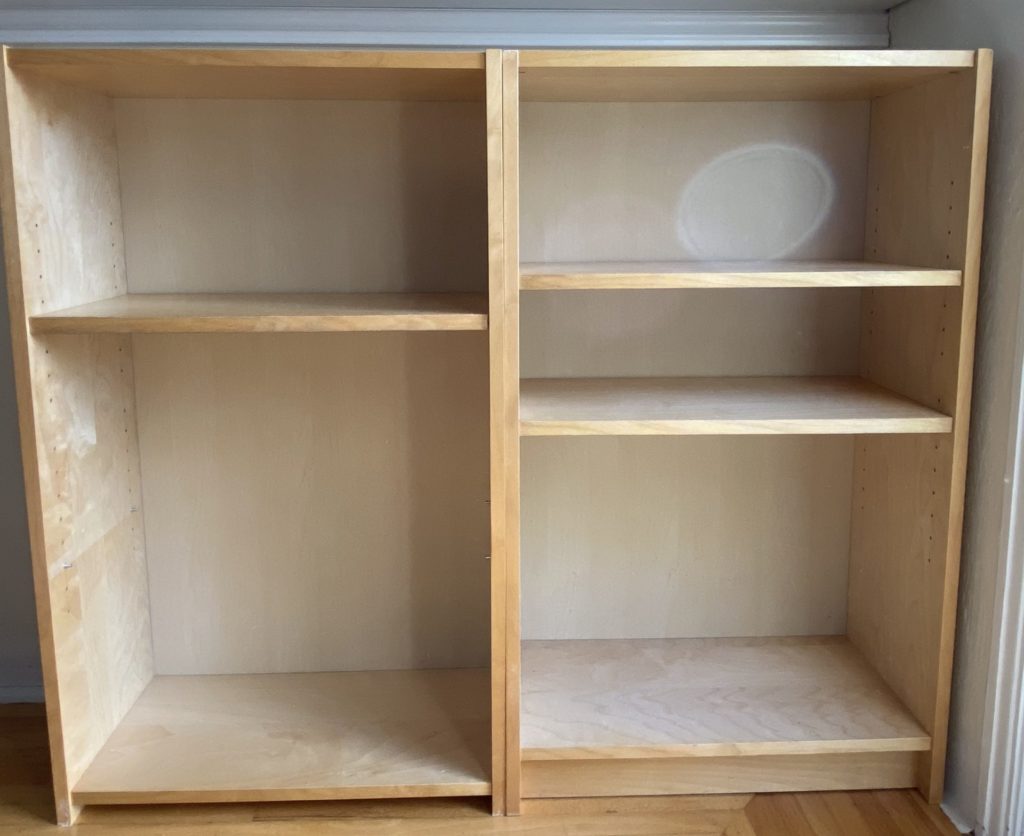
What I needed originally was the bookshelf to be cut in half and find a spot for them. If you are a handy person, go ahead and cut it in half. But if you are like me, ask someone (family or friend) to help you.
For a location, I couldn’t think of anywhere better than behind my workspace (dining room). So that’s where they are going. It’s not typical dining furniture, but hey, at least it’s in the place that makes the most sense!
As you can see in the pictures below, they sat perfectly under the counter.
A problem occurred with the resizing of the bookshelf
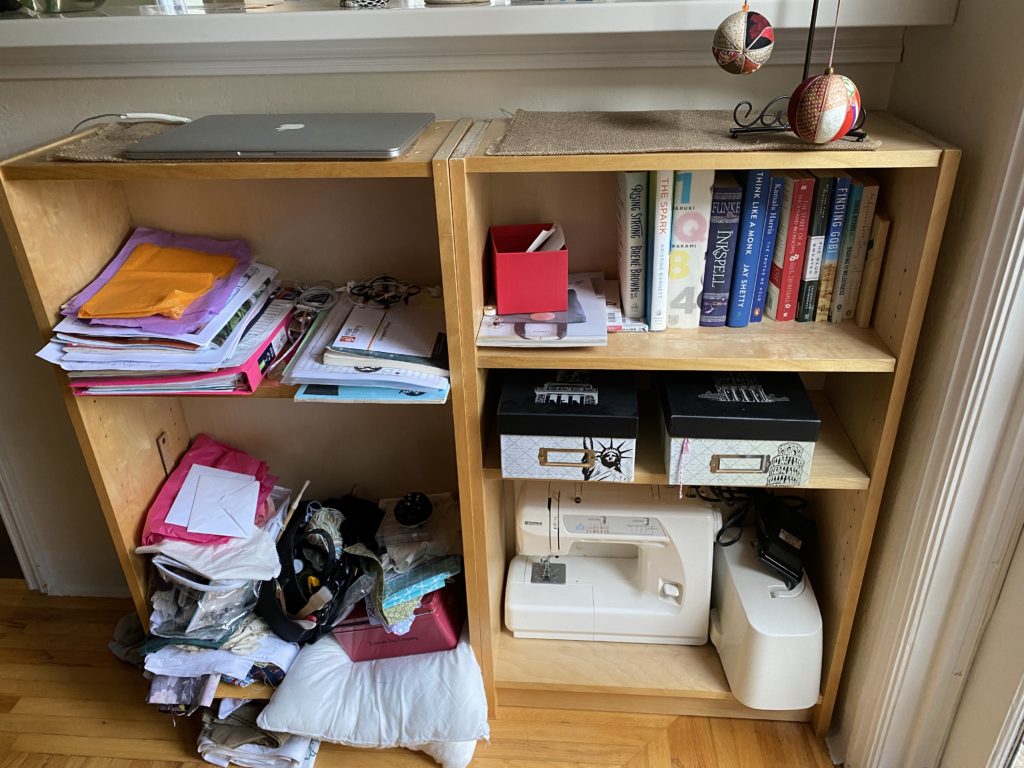
The brand-new (to me) shelves look nice and perfect cut in half. But after a while, it got messy and created a junky pile as you can see in the picture above. Whenever I looked at it, it bothered me.
The main problem I had was sewing items, notebooks, and loose paper on the left-hand side. So the shelves needed some kind of organized solution, but how?
Solution:
Again, I asked my husband to cut any wood pieces he had to create another shelf. On my part as the organizer, I decided to repurpose some cardboard boxes.
What I used for creating organizers
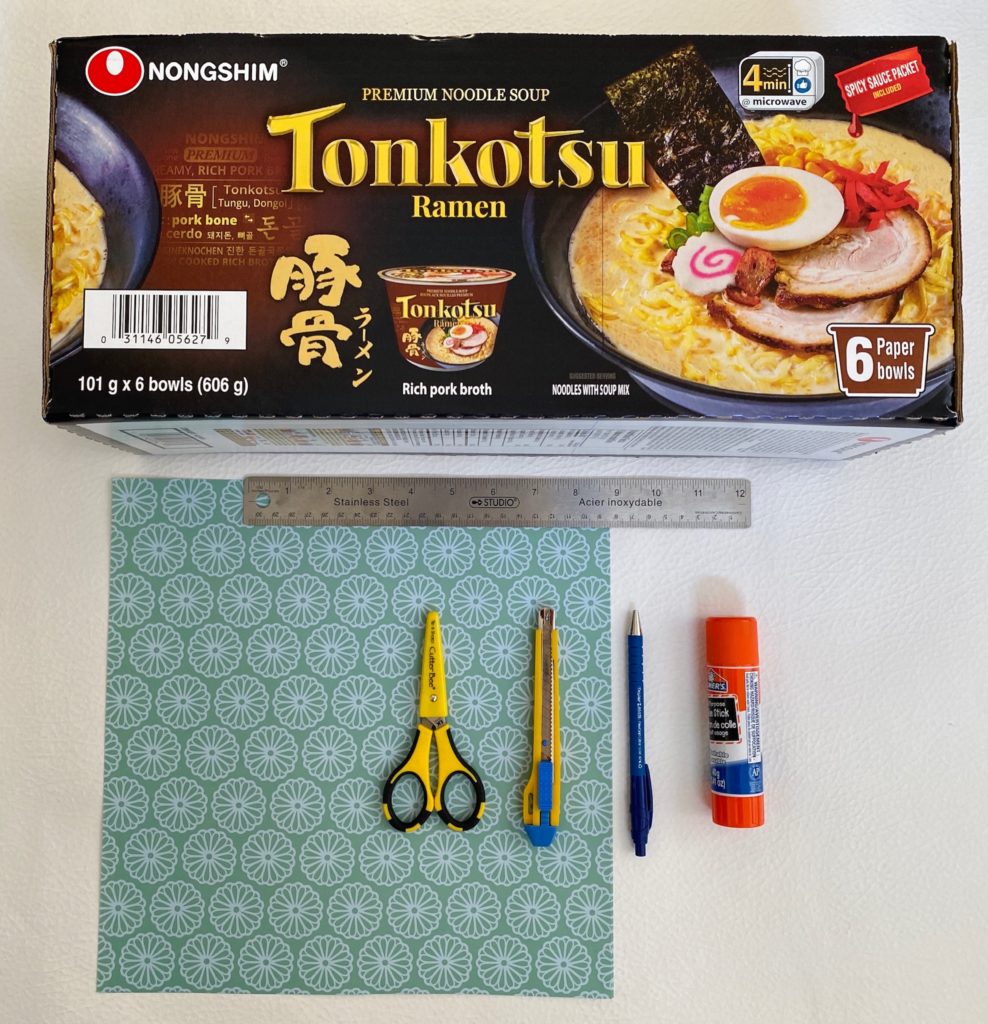
- boxes (L43cm H19cm W15cm)
- ruler
- scrapbook paper
- scissors / cutter
- pen
- glue stick
How to repurpose a box into an organizer
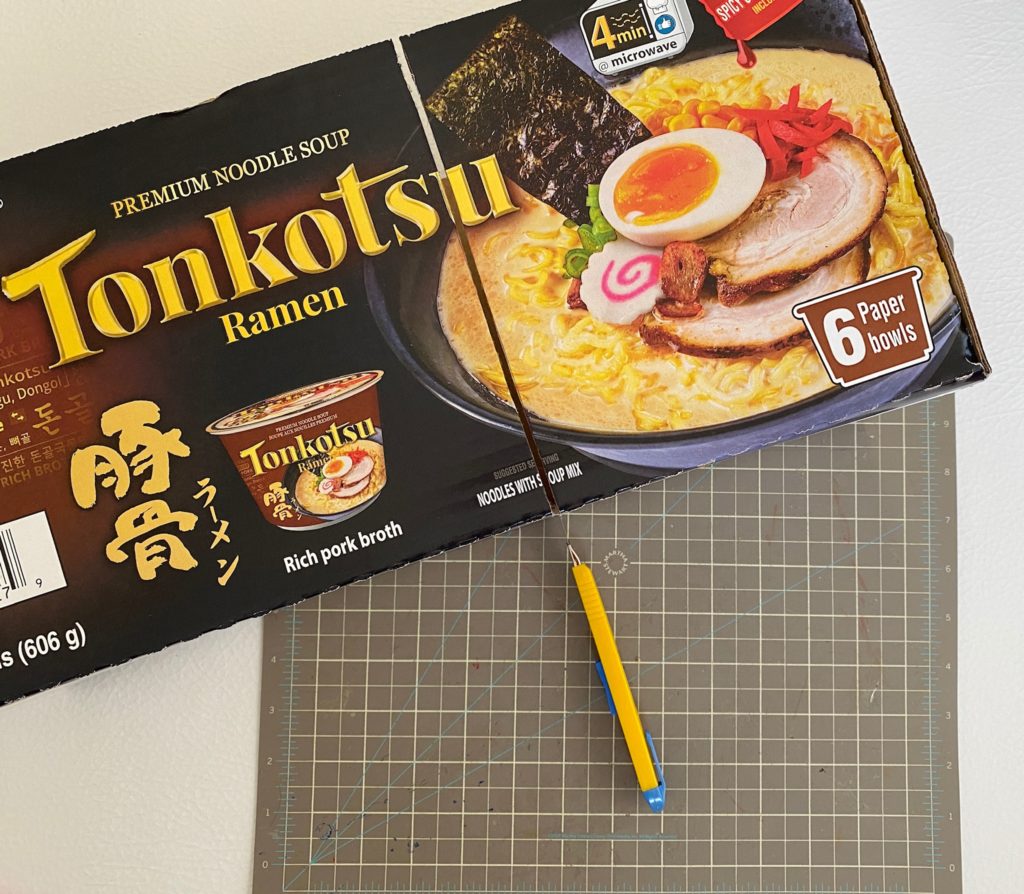
*Watch out for your fingers. If you have a cutting pad or anything to protect a surface, it’ll be wise to use…so you don’t regret it later!
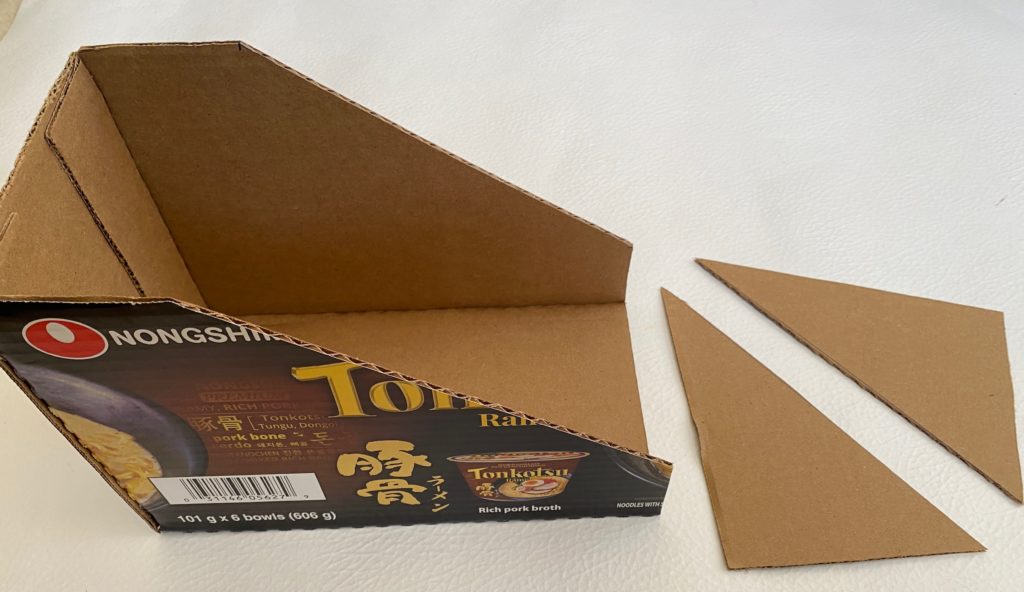
First of all, measure your shelf or any space you want to place an organizer. All you need to do is measure and cut and add any design feature you like.
For instance, I just shortened the length of the box from 43cm to 27cm. Then cut the front corners at an angle, as you can see in the middle picture. The leftover side will be used as two-tier storage as well (see the picture below).
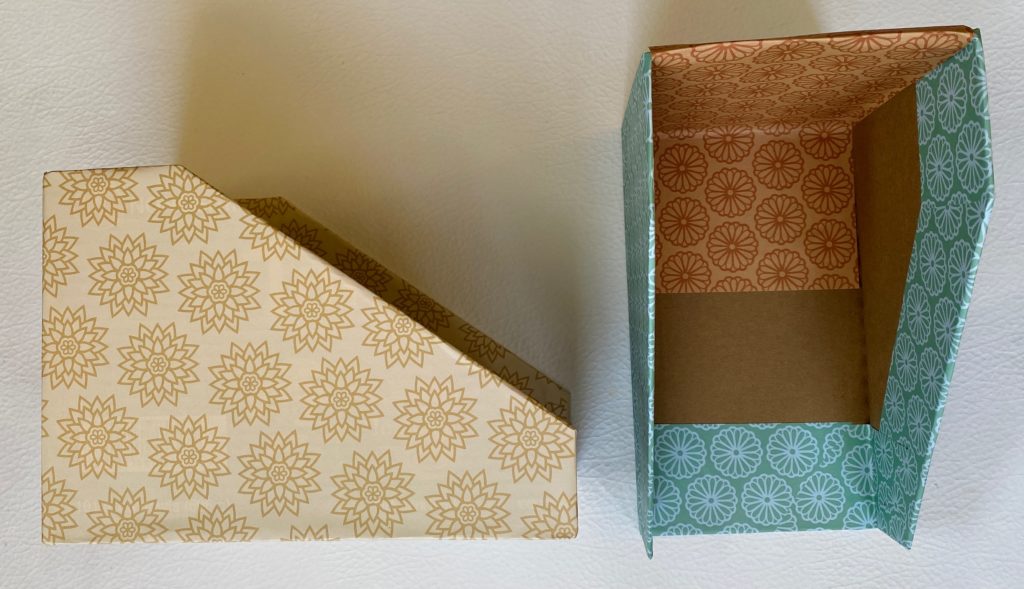
Once you create your desired size organizer, choose some paper and start gluing. This is exactly what I did with creating a repurposed planter. Just cover the box with pretty paper!
If you are like me and are using scrapbook paper, you need to cut more pieces. To clarify, you only need to cover where it’s visible. That means you don’t have to cover places like the very back and the bottom. But if you have large wrapping paper, it would make sense to cover the whole thing.

What do you think of the project? Does it look organized with DIY organizers? The best part was I used everything I had at home. So it totally follows my philosophy: Reduce, Reuse, Recycle for sustainable living!
Mission Accomplished!
Prior to getting the bookshelf, everything was sitting on the floor behind me. As you know an old house (like mine) doesn’t usually come with a lot of storage space. So I desperately needed extra space for my crafting supplies.
Although I got the bookshelf, it wasn’t usable. When something is not quite right, we don’t use it. So it sat in the corner of our living room for a while until I got tired of looking at it.
Now the two shelves are the right height for my workspace behind me. They definitely make my life easier and a bit more organized. It’s funny how quickly I was ready to get rid of the original item, but after repurposing it’s one of the things I LOVE!
There are many items that you can easily resize to make work. It’s really your imagination to see the potential.