
Need a repurposed draft stopper for blocking lights? If your bedroom has a big gap underneath like mine, you need one.
Character houses are nice and I love them, but the gap definitely bothers me. Just imagine you are trying to put your kids to bed, and all you see is the blinding light from the other side of the door. Grrr!!
On top of that, drafts of air & noise make it even worse!! We want our infants and toddlers to go to bed, not us (aka exhausted parents)! Wait a minute…Could I make a repurposed draft stopper?
In this article, you will find How to make a repurposed draft stopper.

What you need
- material (in my case, youth small pants’ legs)
- ruler
- fabric shears
- marking pencil for fabric
- thread
- sewing pins
- filling (in my case, a ripped cushion)
- button
How to make repurposed draft stopper
Step 1: Disassemble & Prepare

cut into pieces 
mark & cut 
pin & sew
1. Disassemble all of the pant legs and make sure to remove the seams. Once it’s done, identify which parts are usable.
Tip: During this process, trim the fabric into the same size. For this project, I am going to use 3 big materials under the shear, a smaller red piece in the front, and a red seam. (see upper middle picture)
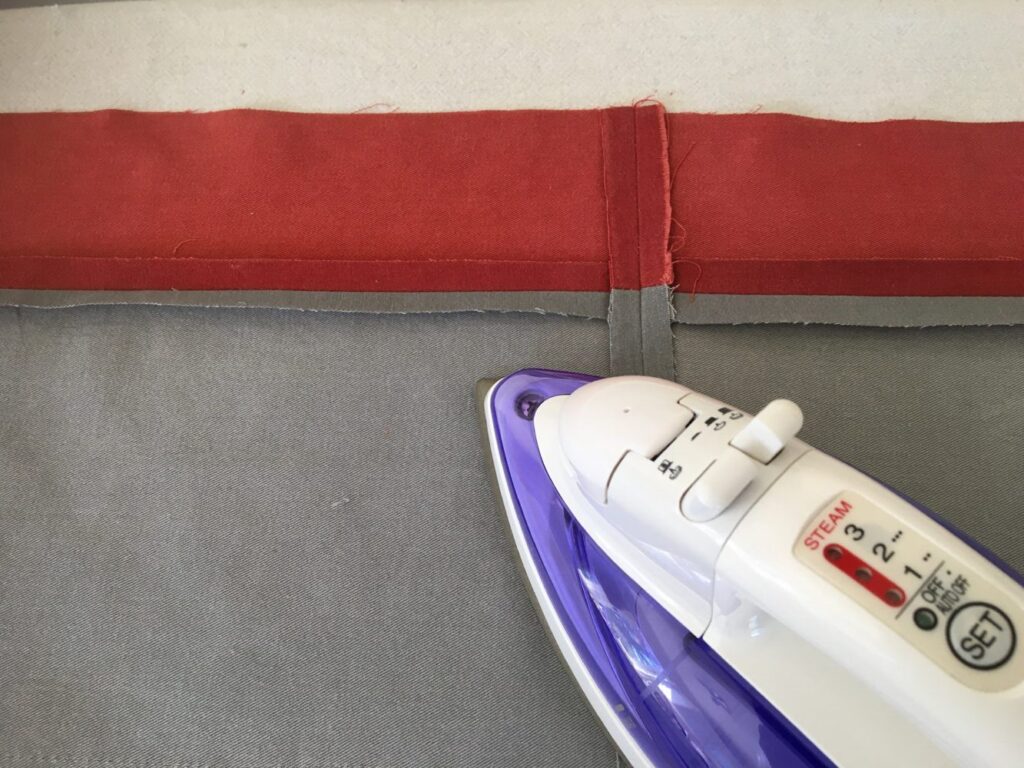
2. Iron the materials. Once you’ve finished, mark on the big red piece of material to cut it in half. To clarify, each red piece will be added to the 2 gray ones later.
3. Place each red material on top of the gray one face to face. Don’t forget to pin them together for sewing.
Step 2: Start sewing the repurposed draft stopper

start sewing 
lay them flat 
pin two pieces together
1. start sewing where you have just pinned. On many of my sewing projects, I sew 1 ~1.5 cm from the edges. Repeat the same process to the other set and iron.
2. Place one on top of the other face to face, and pin the left side together (bottom right picture above). As a result, it becomes a long piece that will later become a tube.
Step 3: Sewing it into a tube
iron the seams 
add extra length 
pin the top 
sewing it into a tube
1. Iron the seams. Unfortunately, my main part still needed an extra 10cm(4inches). As a solution, I added the small red material for an extension. This is like a patchwork. Unless you have one big piece of material, you will repeat the process of pin, sew, and iron.
2. sew the upper part to turn it into a tube and iron. This ironing will require some attention. What we want to avoid is creating unnecessary lines in the tube due to poor ironing. However, we can always iron it again at the end of the project.
Step 4: Stitch, Fill & Sew

hand stitching 
pull and make a knot 
inside out 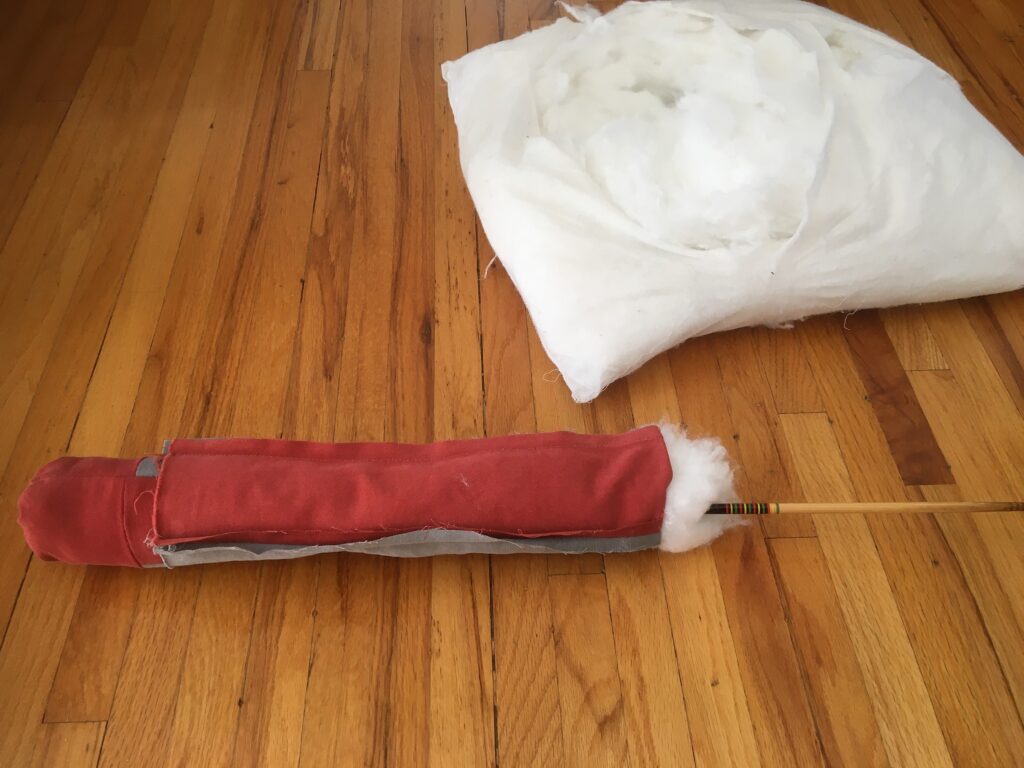
fill the tube 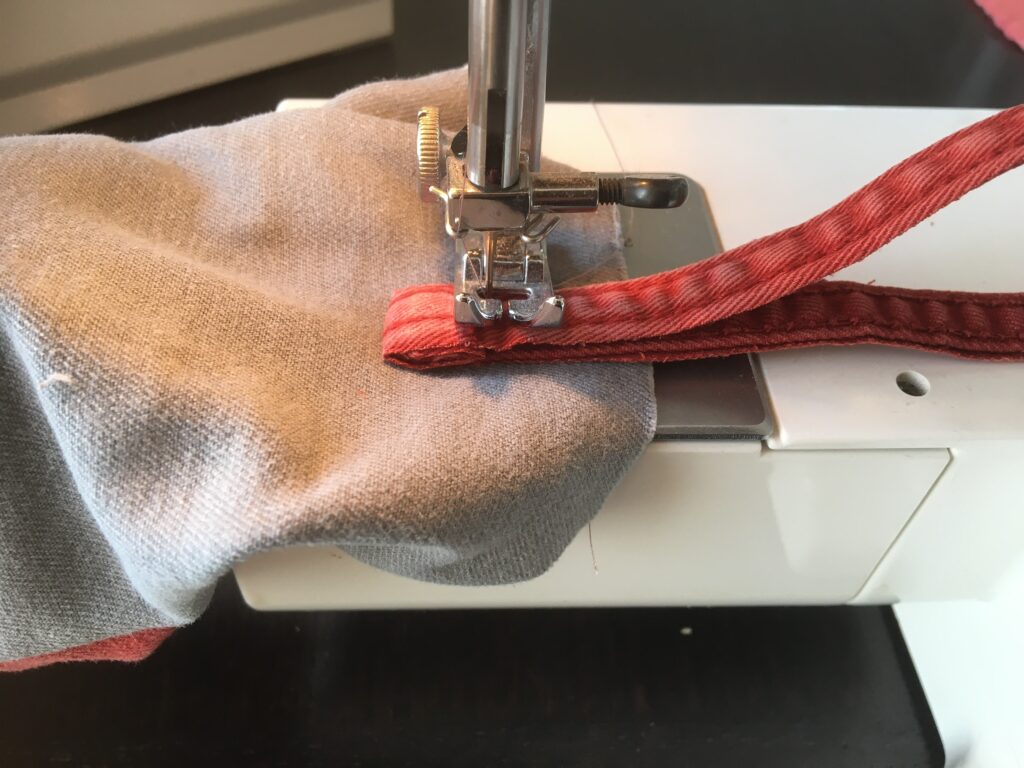
sew a seam to the tube
1. Hand stitch one end of the tube (1cm from the edge). Go around in a zig-zag pattern. When it’s done, tighten the thread and make a knot.
2. Turn the tube inside out and start filling. Using something like a chop stick or a ruler certainly makes it easier.
Tip: I used the filling from a ripped cushion as you can see in the picture. I have accepted the fact I have two sons… Surely, the filling can be anything soft like yarns, wool, or materials.
3. sew a seam piece (of the pants) as a loop for hanging. When the draft stopper is off duty, just hang it on a door knob!
Final step: Complete the repurposed draft stopper

fill to the end & sew 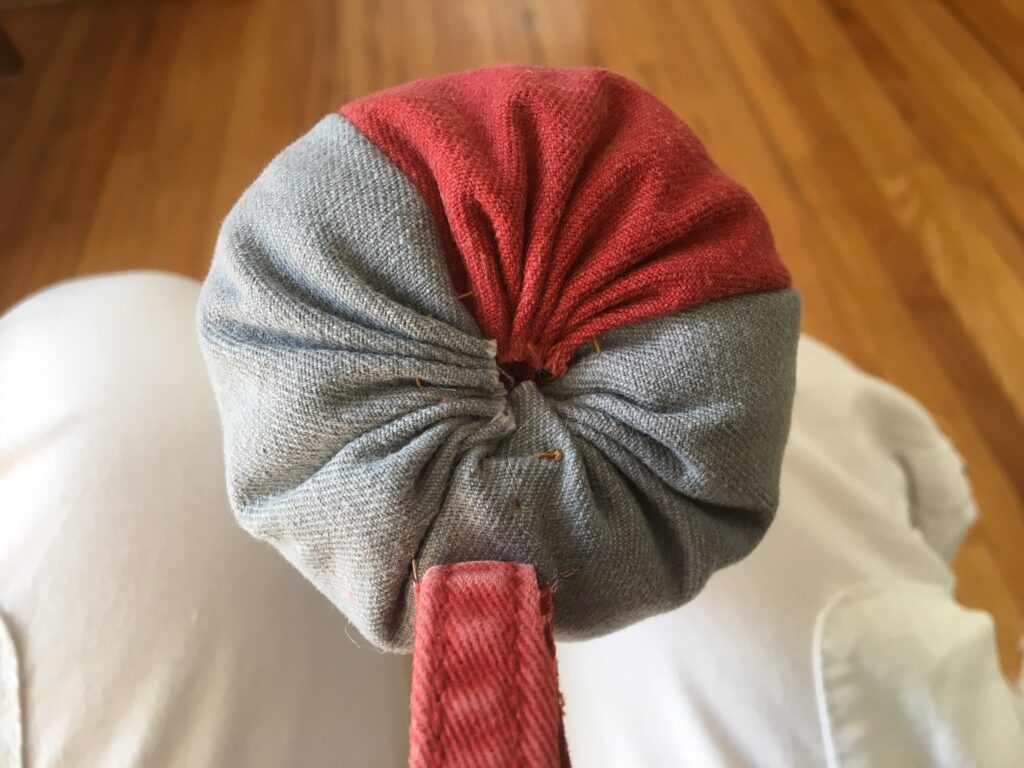
finished look 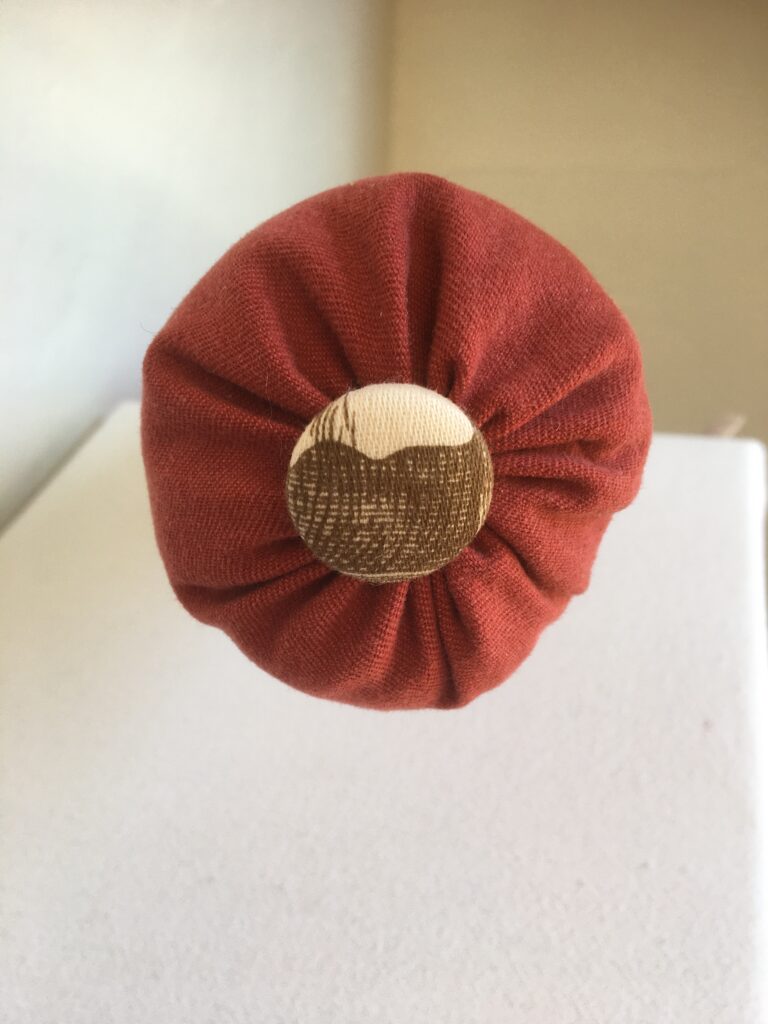
sew a button
To begin, stuff more filling to the top. Just like in Step 4, hand stitch, pull the thread and tie a knot. During this process, push the gathered edges inward.
Finally, sew a button. It looks much nicer aesthetically and will stop the inside from coming out.
Tip: It can be a bead, a felt flower, a pon-pon… anything you can think of.
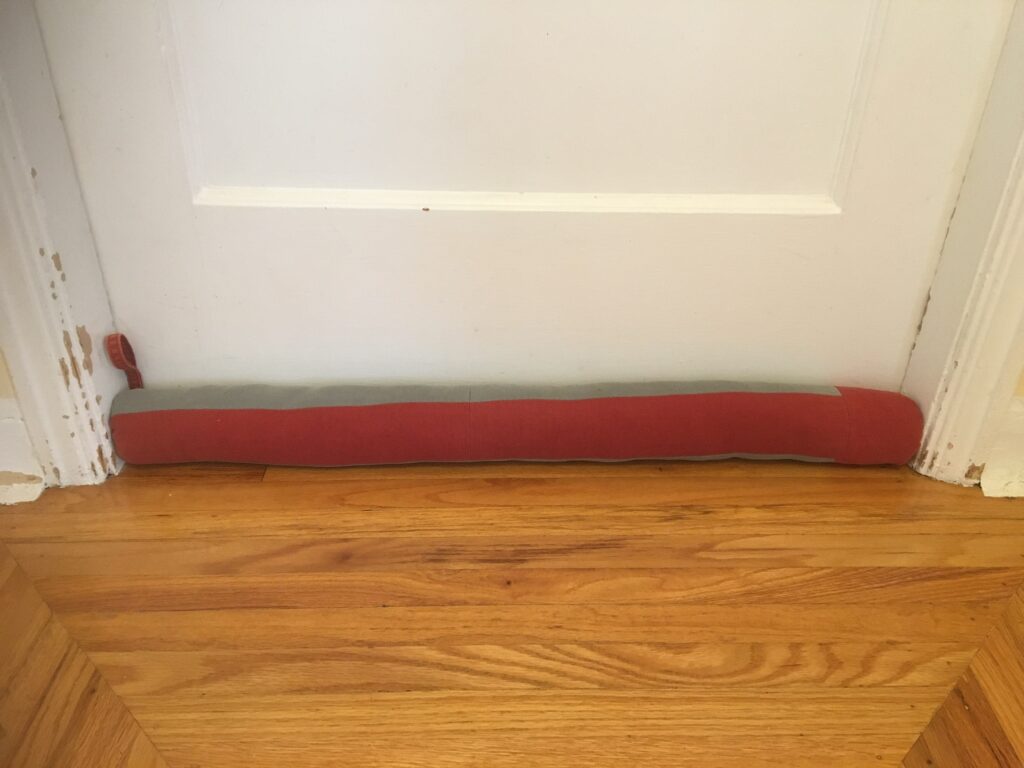
on duty 
a better sleeping environment! 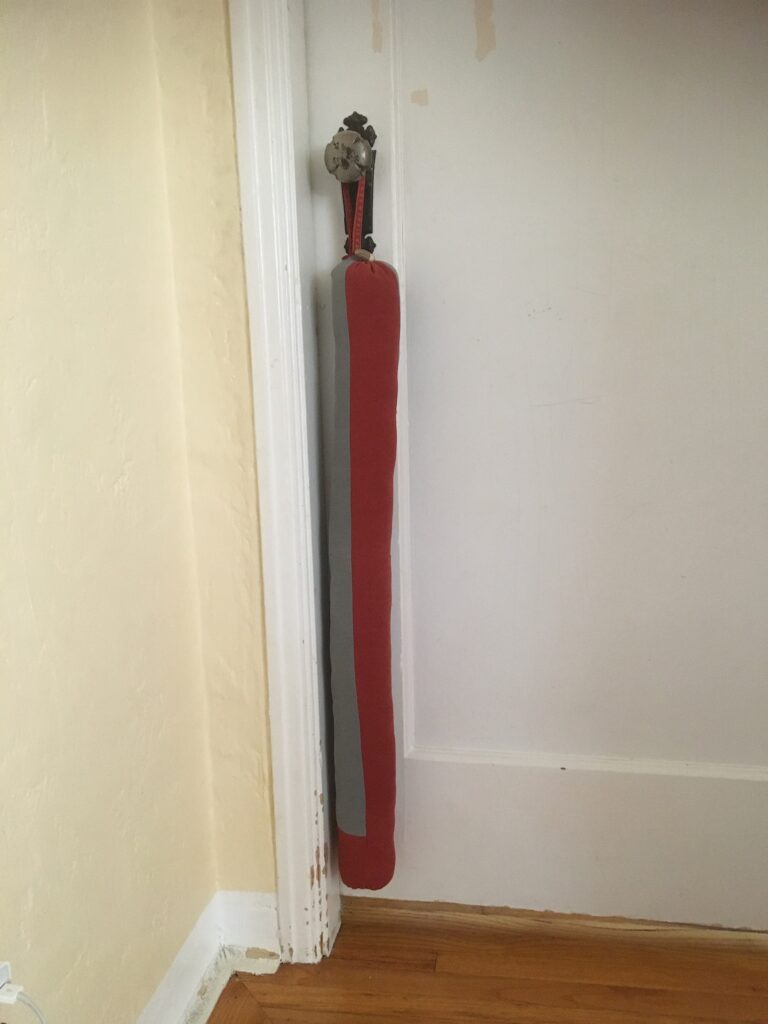
off duty
Mission Accomplished!
In conclusion, I was able to repurpose unwanted items. For some reason, I had kept them for over 5 years. When my boys grew out of it, I cut from the knee down and gave them as shorts to our neighbor. As a result, the bottom parts with all of the patches went into hibernation.
During the lock down (back in March), I reconnected with my creativity. Matter of fact, this was the first creation I worked on. My boys couldn’t even recognize the materials. It made us all smile! On top of that, I saw the neighbor’s boy wearing the shorts this summer.
It is our imagination that can salvage unused items, even 5+ years later!