Why gratitude calendar? In Japanese culture, welcoming the new year is important. We often reflect on the last year and appreciate what we have.
When I was young, our family shared our gratitude at dinner on new year’s eve. It was one of my favourite memories from my youth Since it was rare for all of us to sit at the table together.
As you can imagine, I kept my family tradition. This year, I wanted to make it even better with a gratitude calendar! Like an advent calendar, you get something that makes you happy (other than chocolate). We often take things for granted. During the holiday season, why don’t we start paying more attention to the people who are close to us?
In this tutorial, you’ll find how to make a gratitude calendar.
Before you start making a gratitude calendar…
Share your ideas with your family. Simply tell them how many days and specific comments of each person they need to write.
In my case, 7 days for 3 different people (21 total). What you are doing is giving them time to think about each family member. It is like seeding in a pot! I know it has already started growing a bit in their mind.
What you need
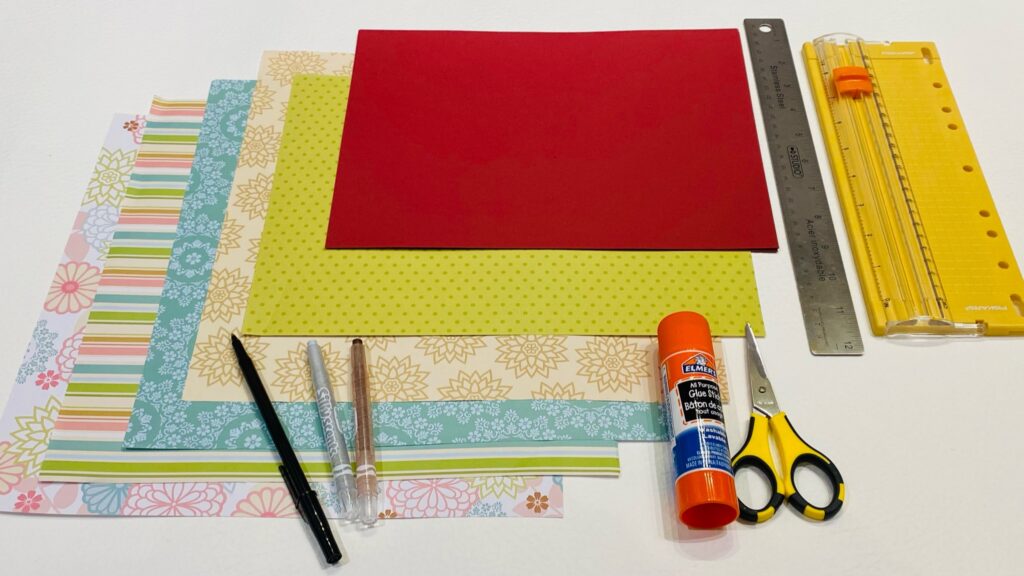
- scrapbook paper
- card stock
- ruler
- paper cutter
- scissors
- glue stick
- pen/color pencils/crayons
How to make the gratitude calendar
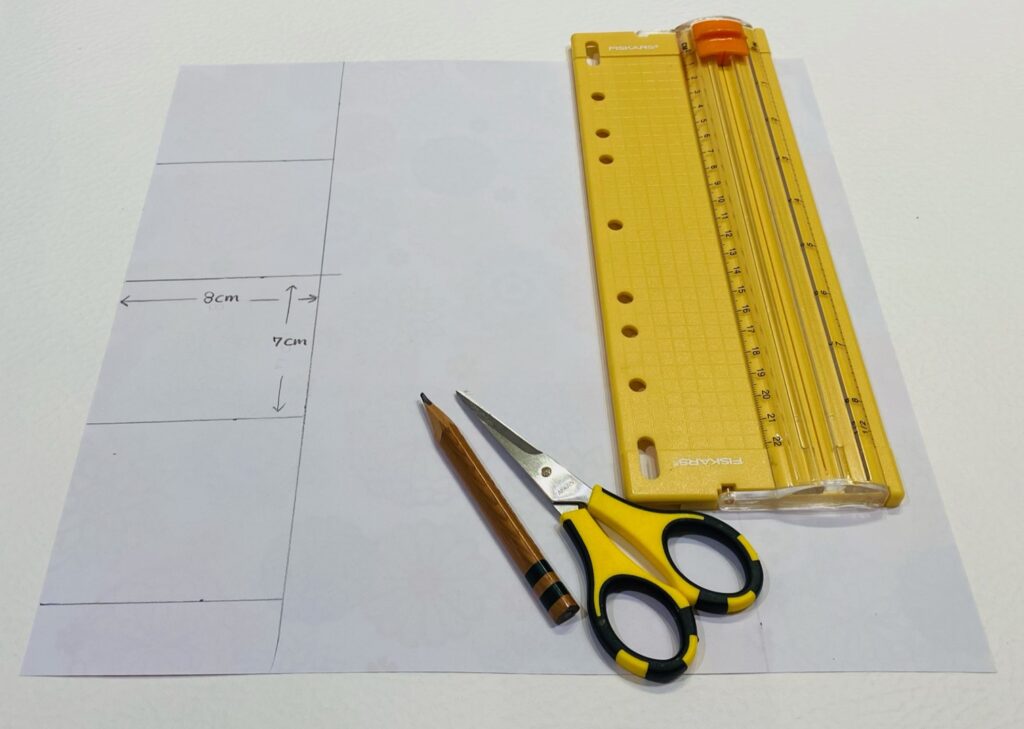
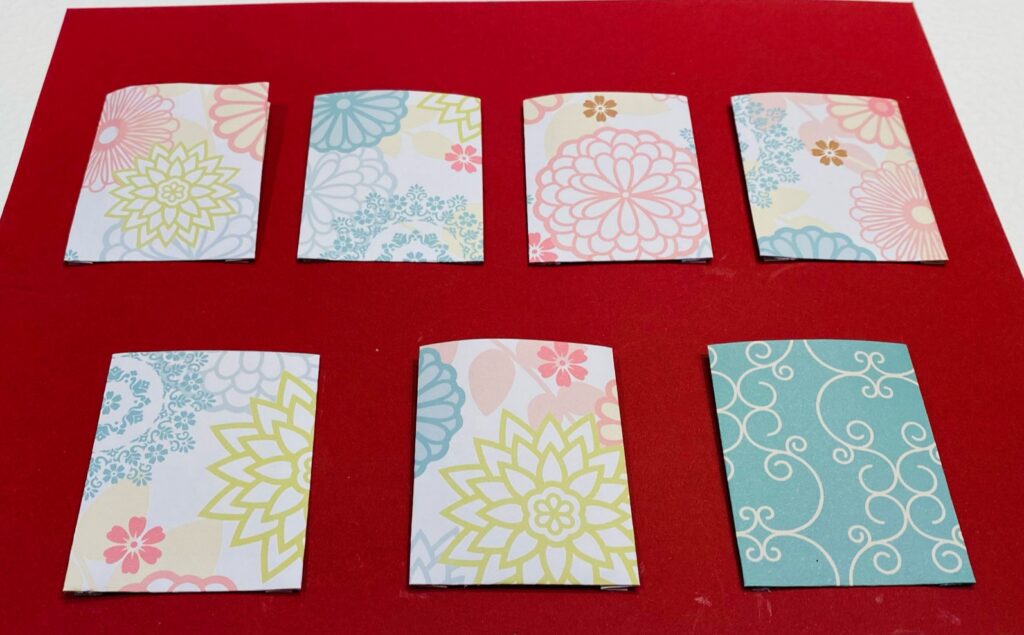
First, use a ruler and mark 7 rectangles: 7cm high x 8cm wide. The paper can be any different colours or patterns to fit your taste!
When you are finished, cut them out using scissors and paper cutters.

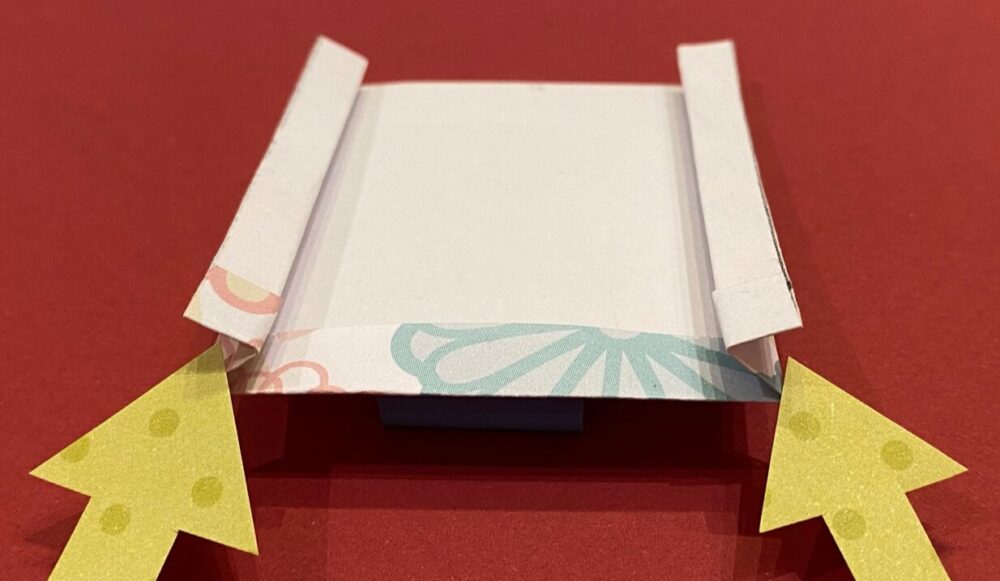
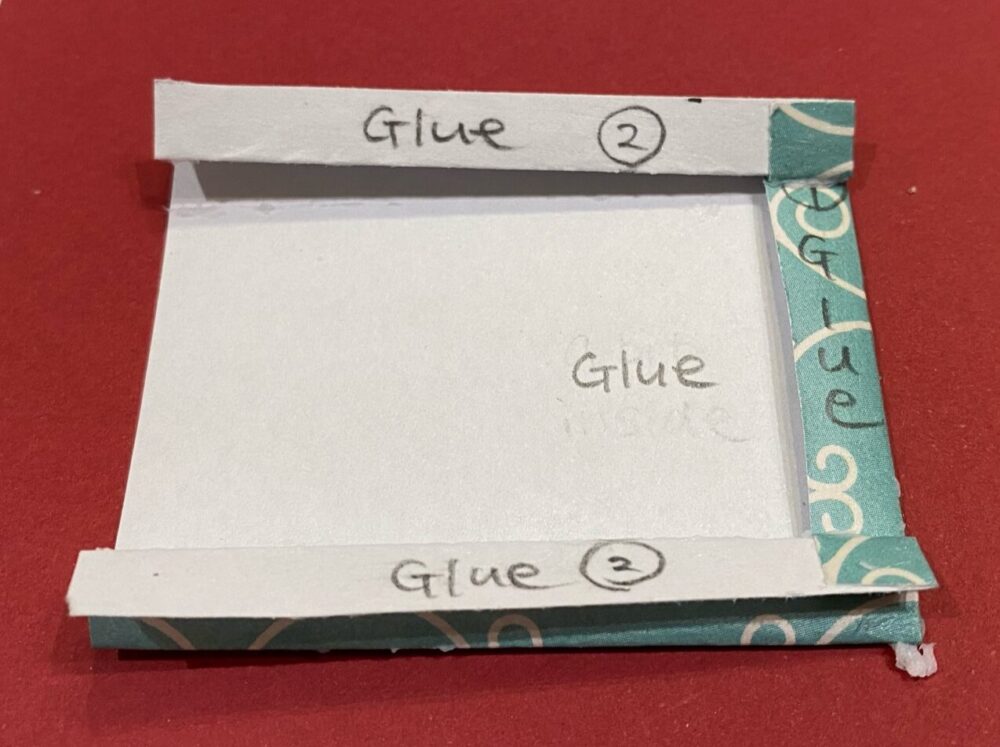
Next, fold all 7 pieces of paper (pockets) as shown in the pictures above. First, fold the bottom up (0.8~1cm). Then fold in both sides (1.5cm). The last step is folding the sides back. That is where the pocket will get glued to the card stock.
With a pencil, mark the middle on the card stock (red). Next, lay the 7 pockets on the card stock and space them out. Once you are ready, let’s start gluing!
First, open up the side folds and apply the glue to the bottom (see the middle picture above). Then fold the sides back again. Apply the glue carefully on the sides (#2 parts). When you finish applying glue, simply place it on the card stock and press it down.
Accessorize it!

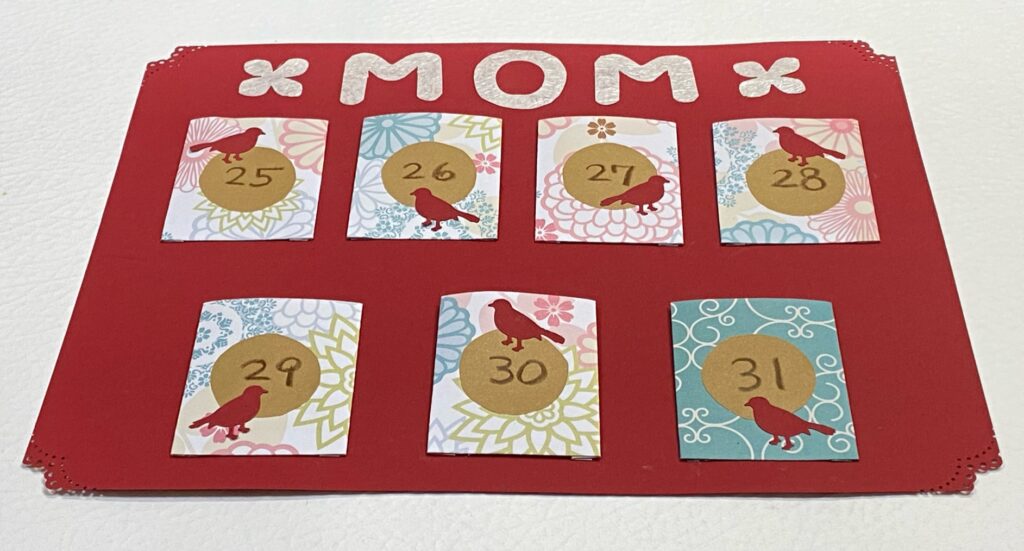
Now, let’s accessorize it with what you have. As you can see in the picture, I used a medicine cup for cutting circles. Also, I used the hole punch to create birds.
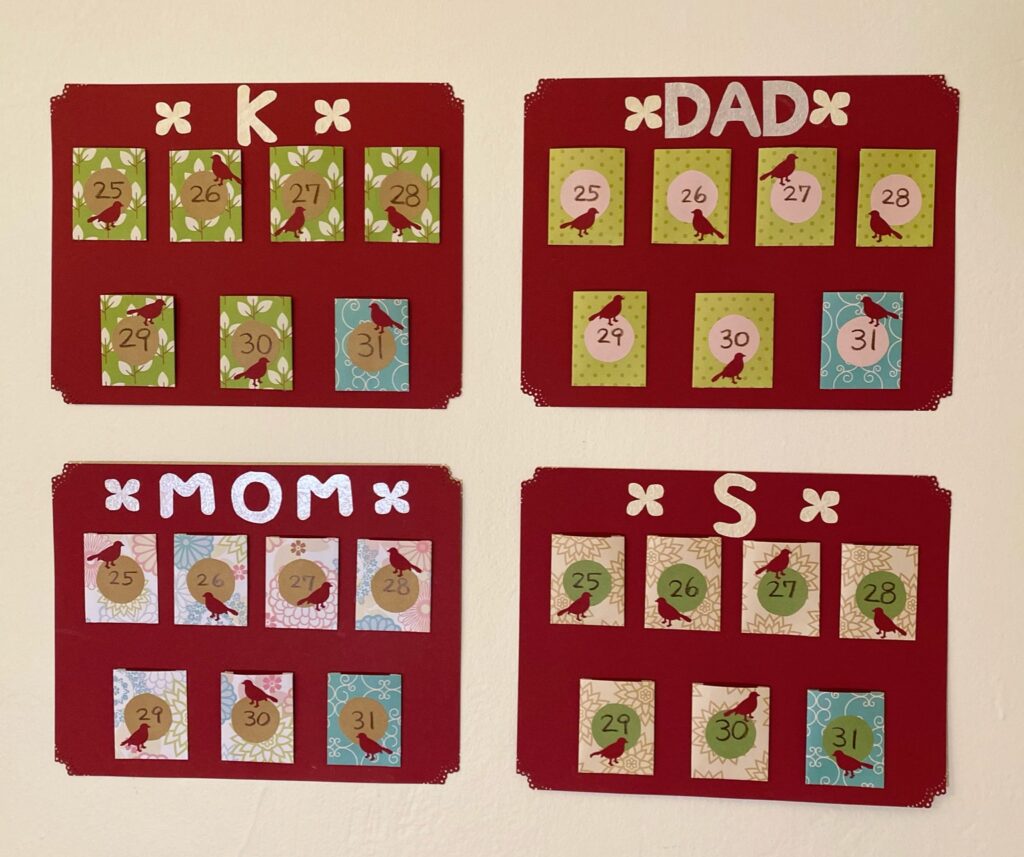
Finally, write the numbers from 25 to 31 (Christmas to the 31st) on the circles. Glue them on each pocket and add a bird to it as well. You can simply write numbers and the name of your family members, or add a little extra. It is really up to you and your imagination!
Mission Accomplished!
As the end of 2020 approaches, I have been reflecting on the year. I have started a daily gratitude journal, which has changed how I positively look at things.
As a mother, I want my children to practice focusing on positives even when things are challenging. And by doing so, they will always find their way.
As a result, I made a gratitude calendar for my family to think about and appreciate each other. It can generate a meaningful conversation at the dinner table. (So the boys can talk about something other than games!)
It is the best way to end the year 2020, and welcome the new year 2021!
Thank you for visiting my blog!